If you want to make your own Blythe eye chips, have no fear. It’s realtively easy with the right instructions. But these instructions have somehow been held secret for the 8 years Ive been a customizer, and it almost drove me crazy trying to figure it out!
It seems like such a simple thing to do, print out some eye chip designs and glue the chips on the paper. Right? Noooooooooo.
You can absolutely paint your eyechips and never have this problem.
As a graphic designer by trade, I wanted to use my skills to design the most realistic eyechips possible. So I was determined to get this right.
It took me 5 years, over 15 glues, and constant testing and tweaking to figure out how to make great eyechips. Crystal clear, super strong, and always placed correctly.
I searched for ‘Blythe Doll Eyechips’ over and over. I researched all of the jewerly forums about glass cabochons. I even paid for a downloadable eyechip printout just to find out what glue and technique the seller would suggest. Even then, I had to ask for instructions and didnt quite get the answer I was looking for.
Eyechip Problem #1
The first problem I had was silver spots and streaks in the finished product. These are caused by air bubbles in the glue. Flat eyechips arent perfectly flat. They’re just a bit concave. This makes things much harder. No matter which glue or technique I tried, those pesky silver spots always showed up.
Paint the glue on the paper, paint the glue on the chip, use a little glue, use a LOT of glue, place them gently and let them float, press down hard and push the bubbles out. It didnt matter. Spots always popped up no matter how careful I was to remove air bubbles before setting the chip.
Eyechip Problem #2
The second problem was placement. Blythe eyechips are small. 14mm. You have to get them PRECISELY in the right spot if you’re using clear chips. If the pupils are off center your doll will look strange.
You CAN buy eyechips with a pupil… in two sizes actually. They help ALOT with both of these issues.
But I wanted to be creative with a variety of pupil sizes, so I desperately wanted to conquer the clear eyechip issues. Most glues, you just cant see what you’re doing.
It’s not the paper. It never was the paper that caused any of my issues. Some people have their designs printed professionally. I never saw a need for this, because the paper I used didnt smear or melt. And the right glue would seal the design for a long lifespan.
After 5 years of experimenting, I found out two things.
I needed a clear glue to place the chips in the exact spot I wanted. AND, I needed a thick gel viscosity to push air bubbles out.
None of the pendant glazes worked. Superglue gel didnt work. Clear tacky glue wasnt strong enough to keep the chips stuck. E6000 was strong and a good consistency, but I wasnt willing to risk my health and smell up my house.
After a few years of struggling, I started experimenting with hot glue. I smacked my head when the idea came to me.
Right, duh. Hot Glue… and this was working. UNTIL the edges peeled when I turned the eye mechanism, leaving large silver blobs AFTER installing them on the doll. I wasnt getting a good seal and the chip would eventually come apart at the edge.
What fun it was to pull out eyechips I’d just installed, to install new ones and have the issue happen all over again.
Hot glue was perfect though. It goes on clear, dries crystal clear, it’s thick enough to push the air bubbles out, and has the perfect working time. In this application, it’s also very strong.
But is hot glue a quality glue? Gorilla Glue says that their sticks wont yellow over time and are weather resistant for outdoor use. All of the hot glues I’ve tried are similar, and made in the USA!
Though Im going to give you ONE MORE glue and technique, the one that I use to this day, you CAN use hot glue if you really want to.
Just make sure to let the glue cure completely before cutting and installing on your doll. Find the strongest hot glue you can. And make sure to let it sit for at least 24 hours for a full cure time. I usually let them sit for a few days. If, by the time you cut them, they start to peel off the eyechip at the edges, you may need stronger glue, or to le them sit longer.
Finding the Right Glue

SO… After even MORE research, I finally got the technique right with the right glue that worked so perfectly well. Clear Gorilla Glue. It goes on crystal clear, dries crystal clear, has the perfect gel consistency and I haven’t had problems with spots or streaks since. If you’re having eye chip issues… try this technique.
Paper
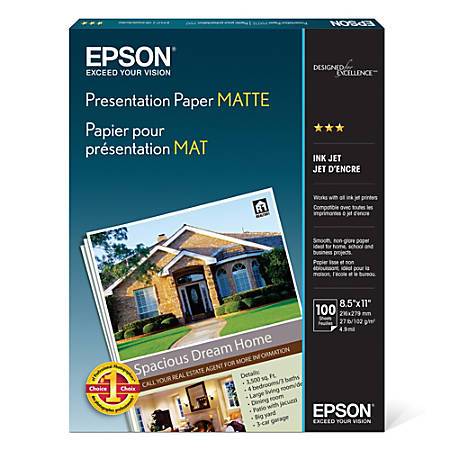
I’ve used a lot of different types of paper, but the one I like the best is Epson Presentation Paper, Matte. It’s bright white and not too thick. And the matte finish is helpful in keeping the ink from smearing.
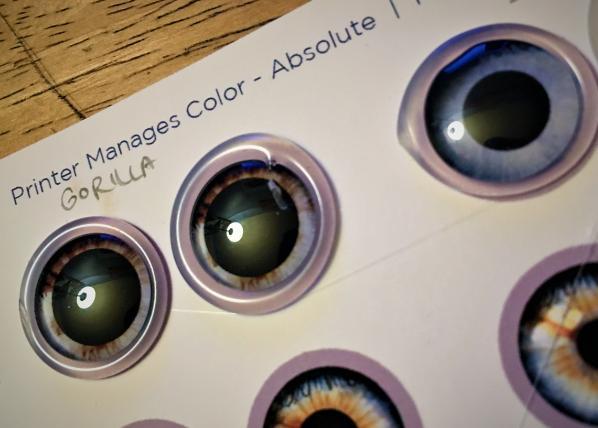
Print the Eyechip Sheet
There are dozens of printable eye chip sheets for sale on Etsy. I even have my own Printable Eyechip File for sale on etsy.
Step By Step Instructions for the Perfect Eye Chip Every Time
- Pull the original chips out with the hot glue stick method. (see below) Make sure they come out clean. If not, scrape the eyechip bits out with an exacto knife. Be careful not to gouge the outer portion of the eye. Little nicks can be sanded. Big nicks will show.
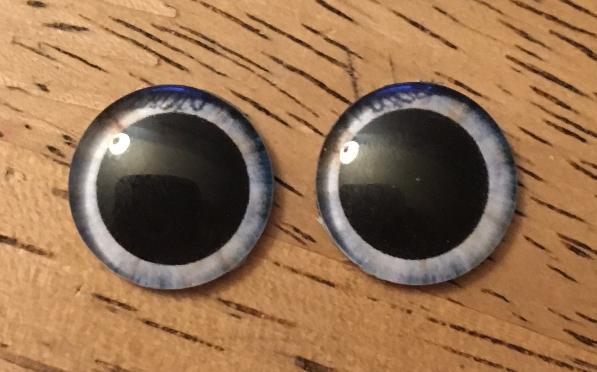
- Buy 14mm flat eyechips specifically manufactured for Blythe Dolls. I like glass.
- Design or purchase a sheet of awesome eye chip printables.
- Print them on the highest quality setting, on Epson Matte Photo Paper.
- Buy a bottle of clear Gorilla Glue.
- Place 1-2 drops of clear gorilla glue on the paper just over the pupil.
- Place the eye chip down on the center of the glue. Hold the eye chip by its edges. Its best to keep oil from your fingers off the back of the eyechip where it wil be glued.
- Move the chip around lightly in a circular motion so that the glue oozes evenly out of all sides to the edge. You will see air bubbles push out of the edges.
- Look at the placement of your eyechip. Be careful to see how the pupil will look through the chip. You have a little bit of working time to get it right. I like to center the pupils very slightly crosseyed. They’re very very cute that way.
- Let them sit for 2 days to cure fully. You need a solid seal so the edges dont separate away from the paper.
- When fully cured, test your ‘stickiness’. Pull up on the edge of the chip and push the back of the paper slightly. If the chip pops out of the glue, it hasn’t set well enough. Pull it out, clean it up and try again. You want it to stick so well that the chip would rather rip the paper than pop out of the glue.
- Cut around the chip with scissors.
- Scrape the extra glue off the edges with your fingernail.
- Optional – sand the edges with heavy grit sandpaper. Hold the chip facing you and sand the edge, back to front, working your way around the chip. (back to front so you dont rip the paper off the chip) You’ll now have a clean edge on your paper with no extra glue.
- Test your chip in the dolls eye socket. If it doesnt fit, sand the edges some more.
- MAKE SURE you’re installing them the right way! If you’ve disassembled your doll to install the eye chips, its hard to tell. I’ve put them in upside down… What a head smacker when you’ve realized you glued them in the wrong way. I check and double check with the eyelids to make sure they’re going in right side up.
- Squeeze a thin line of tacky craft glue around the back edge of the chip, you dont need much. You can use just about any glue to stick the chip into the eye socket. I like tacky craft glue or even school glue. It’s strong enough set to keep the chips in securely, but its not totally permanent. So if you decide to remove them, or if you want to change them again, you wont have a hard time getting them back out with the hot glue stick method. Some people also use double stick adhesive.
- Carefully place the eye chip in the eye socket on the doll.
- Check that the chip is positioned correctly in the socket and adjust accordingly. If you have a mishap and cant get the chip back out, remove it with the hot glue method. Hot glue comes off the front of the glass easily. Clean up the eye socket and try again.
- Once its placed correctly, press and hold the chip in the socket with a little pressure to make sure the glue sets securely.
- If you find that your eyechips are becoming cloudy when set, this is usually the glue drying. This has happened when I’ve used too much glue to install the eyechip. It should take a few days to dry clear. If you cant wait that long, or if it permanantly smears the ink, you’ll have to redo them using less glue.
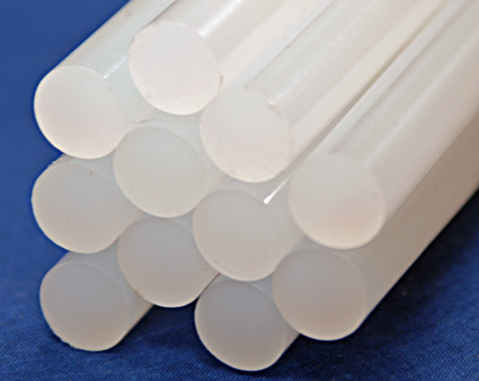
Eye chip removal with the glue stick method
First, to remove the old eye chips, I will real quick teach you the glue stick method. You can do this on the doll without taking it apart. Buy a pack of large glue sticks. Melt the end slightly with a lighter or a candle. Stick it securely to the eyechip in the doll’s eye socket. Let it dry for at least 10 minutes. Gently pull the glue stick off and the eyechip should come off cleanly with the eyechip. They come off so easily on the newer dolls. If you have an older doll, you may have to try a few times.
If you boo boo making an eyechip, have no fear, your chips arent ruined forever. Sometimes you can just peel the paper off and its clean. If they dont come clean, let them sit in water, acetone or alcohol for a while. Clean off the glue and paper from the eyechip and start again.
Best of luck with your eye chips. I hope they come out perfect every time!
Happy gluing!